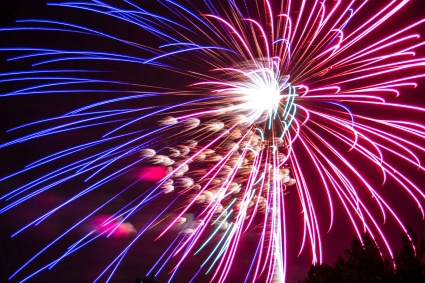
“Fireworks July 4th Independence Day 2013 Polo Field” by Colin Henderson is licensed under CC BY-SA 2.0
If you’re an inexperienced photographer, like me, you’ve probably tried to take photos of 4th of July fireworks with disappointing results. Well, this year is going to be different!
You’re going to learn a lot about your camera while working your way through this guide, and some of it might seem a little technical but don’t worry, it’s actually not that difficult.
Lets get started!
Taking Photos at Night
First, you need to understand a little bit about how your camera works at night. If you’re going to be out on the 4th of July, you’ll probably want to take photos of friends and family too and not just pictures of fireworks, in which case these tips will be super helpful.
Here’s a 7-minute video with some great quick tips on night-time photography.
You won’t get good photos if you’re using the Automatic modes on your camera. A digital camera has a light-sensitive sensor that works best during the day, so if you try to use it at night the flash will ruin most of your photos.
The trick is to get more light into your camera. You do this by setting the aperture, shutter speed and ISO setting.
The aperture controls the amount of light entering the camera. It works a bit like your pupils. The lower the f/stop number, the more open the aperture is, letting more light into the lens. At night, you’ll most likely want to shoot with the aperture wide open.
When you snap a photo, you open the shutter. The longer the shutter stays open, the more light your camera’s sensor absorbs. You need to use longer shutter speeds at night so that the sensor gets enough light to create the image. If you bump or shake your camera while the shutter is open, you’ll get a blurry photo.
The ISO setting on your camera controls the light sensitivity of your camera’s sensor. If you’re in extreme darkness, you’ll want to increase the ISO setting. Keep in mind that the higher your ISO setting, the more noise your camera’s sensor creates, which can make your photos look grainy. You can use noise-reduction filters in a photo editing program if this happens to you.
- Switch your camera to manual mode
- Aperture: Choose the lowest f-number your camera has. You might need to do one, ten, or even 30 seconds in some cases.
- Set a long shutter speed. Start at 1 second and add/reduce time as necessary (Nikon recommends 1/15, 1/8, 1/4 second or longer)
- Prevent blurry photos by using a tripod (or Gorillapod to travel light) and use a self timer or remote to snap the photo
How to Take Photos of Fireworks
The tips above are the basic starting points you need to know before you take photos of fireworks, but lets get a little more specific. For fireworks photography you still need a tripod, and you’ll need to mess around with your aperture, shutter speed and ISO settings. You also want to scout out your location.
If you’re going to a park where there are a lot of people, you’ll also want to scope out a spot where you’ll have room to set up a tripod. You want a spot where you’ll have room to setup and without obstructions. Make sure the spot you choose won’t have people walking in front of your camera constantly or where people might kick your tripod, and stay away from streetlights and other artificial light sources to avoid light flare.
You also want to choose a spot where the wind isn’t coming towards you, otherwise you’ll get smoke in your shots, which will get worse as the show goes on.
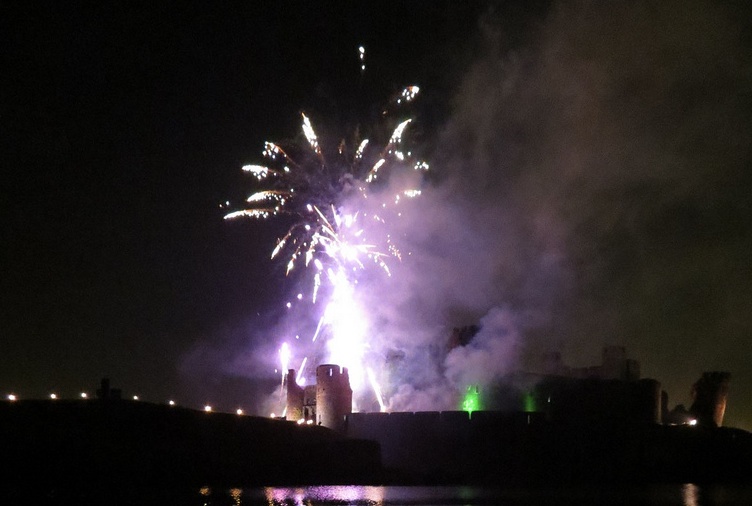
“Fireworks & Castle” by Martyn M is licensed under CC BY-SA 2.0
Next you’ll want to become familiar with your lens focus. Auto focusing features can become confused by the brightness of the fireworks and the smoke they create. You’ll want to turn auto-focus off so that you can manually focus your lens. If your camera doesn’t allow you to turn off auto-focus, set it to Landscape mode, if it has one. The icon will look like a small mountain range. It’s the same as setting the lens on a film camera to infinity.
To get the best photos possible, set your image quality to high (but not RAW or the photos will take too long between shots). Lower quality settings increases the amount of compression on your photos and can introduce artifacts into your photos, which is even more likely to happen when taking photos at night of fireworks.
You want to use a low f/stop setting to let more light in. The suggested settings are anywhere between f/8 and f/16.
As mentioned above, ISO settings that are too high can result in grainy photos. Many photographers recommend settings of 50 or 100, although newer and faster cameras work well at ISOs of 800, 1600, and even 3200. This is something you’ll have to play around with on your own camera.
For exposure, you’ll want to try using shutter speeds anywhere between 1-4 seconds. You want to try to get your shutter to open at the beginning of the firework burst and close when the explosion is at it’s largest. Also worth noting, exposure time is usually shorter when using a zoom lens as opposed to a wide angle shot. Longer shutter speeds will also create light trails if the shutter is open for longer times. This is a fun photo effect that you might want to play around with.
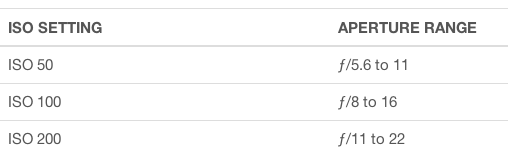
Below are some ISO and f/stop recommendations from Jim Bartman of the New York Institute of Photography
Putting It All Together
Now that you know all of the little intricacies of taking photos at night and fireworks photography, let’s put it all together in a quick bulleted list that you can refer back to later.
Quick fireworks photography tips:
- Use a tripod. Without one, you are almost guaranteed to take a blurry shots.
- Turn off your flash, or black it out with electrical tape
- Pre-focus your camera. Set it on the infinity setting or Landscape mode
- Set the images to high-quality (but not RAW)
- Set f/stop between f/8 and f/16
- Turn off auto ISO and set it to 50 or 100 if possible. Newer cameras might be fine at much higher settings
- Use a remote or the timer setting to prevent bumping the camera during shots
- Set the exposure from anywhere between 1-4 seconds. Start at one second and work up from there.
Practice a few nighttime photos the day before (or earlier) than 4th of July to make sure that your camera is ready. You don’t want to fumble around with your camera’s settings at the last minute and risk missing some great shots.
Even if you prepare ahead of time, you still might end up having to mess around with your camera settings the day of the event, so consider bringing a small flashlight so that you can see the settings on your camera.
You’ll probably be taking a ton of photos too so make sure to bring a large memory card, or a backup, as well as some backup batteries.
If these fireworks photography tips have been helpful, let me know in the comments.
Have a happy 4th of July!
Sources: